
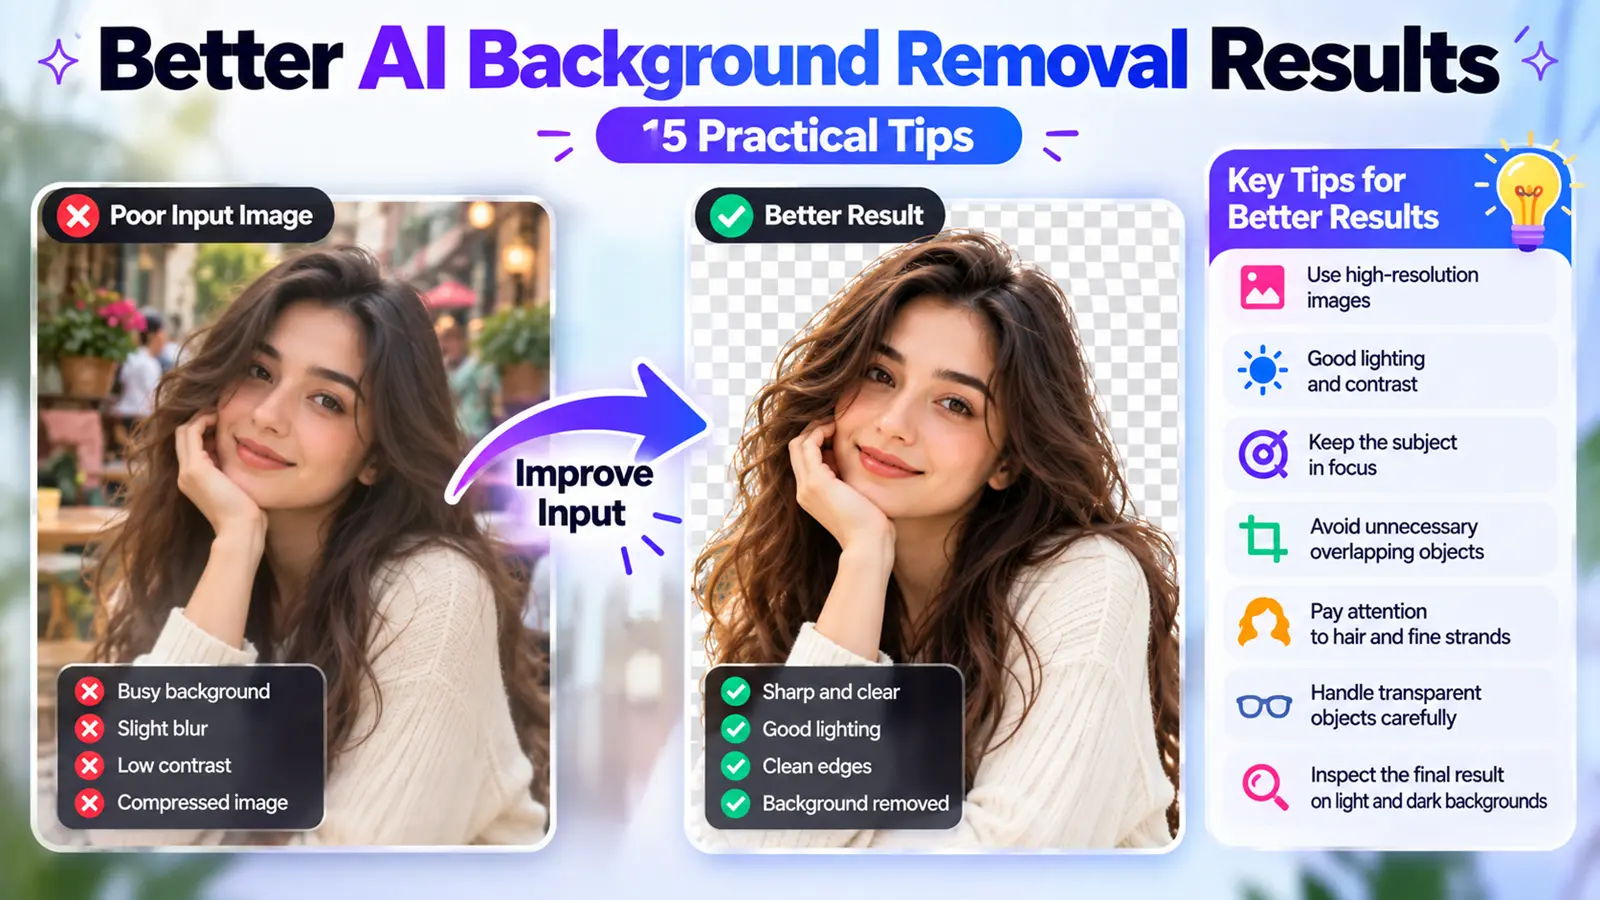
AI background removers work best when they can clearly distinguish the subject from its surroundings. Image resolution, focus, lighting, contrast, compression, transparency, shadows, and fine details can all affect the final cutout.
The following practical tips can help you prepare better source images and identify common problems before using the result.
Try Your Image with ByByBG →
What Makes a Good AI Background Removal Result?
Before getting into the tips, it helps to know what you're aiming for. A clean cutout should ideally have:
The main subject fully preserved
Natural-looking edges
Fine details retained where possible
No obvious background patches left behind
Interior spaces correctly removed
No distracting halos
Appropriate shadow handling
Correct transparency
Useful output resolution
1. Start With the Highest-Quality Original Image
Starting with the highest-quality original is one of the most important ways to improve background removal results. Prefer the original camera or image file over a screenshot, a social-media download, a tiny thumbnail, or a repeatedly compressed copy.
2. Use a High-Resolution Image
High resolution isn't automatically the same as a good image, but it does provide more spatial detail for the model to work with. A 100-pixel-wide product photo gives AI far less boundary information than a reasonably detailed original.
Potential benefits include more edge detail, better fine-hair visibility, better representation of thin objects, and an easier result to inspect afterward. There's no universal minimum resolution requirement — more detail simply tends to help.
3. Make Sure the Subject Is in Sharp Focus
A sharp boundary between subject and background is much easier to work with than a blurred one, where the transition becomes a zone of mixed pixels rather than a clean edge. Motion blur and focus blur can both make segmentation more ambiguous.
Focus directly on the subject
Avoid camera shake
Avoid excessive subject motion
Use the sharpest source image available
4. Create Good Contrast Between Subject and Background
This is one of the strongest practical tips available. A dark product against a light background is generally easier to process than, say, a white product against a white background, or green clothing against green foliage.
You don't always need a plain background, but a visually distinct subject boundary does tend to make automatic segmentation easier.
For more on why this matters, see Why AI Background Removal Sometimes Fails.
5. Use Even, Sufficient Lighting
Poor lighting can cause lost edges, deep shadows, visual noise, color blending, and overexposure — all of which make it harder for the model to see the subject's true shape.
That doesn't mean "always use maximum brightness." Overexposure can destroy edge detail on white or light-colored objects just as easily as poor lighting can. The goal is sufficient, balanced lighting that preserves detail in both highlights and shadows.
6. Avoid Overexposed White Subjects
Picture a white shirt photographed against a white wall under strong light. If both the subject and the background end up close to pure white, there's very little visual boundary left for the model to detect.
Preserve edge detail wherever possible
Use contrast between subject and background
Avoid blown-out highlights
Choose an appropriate backdrop for light-colored subjects
See How to Remove White Background from an Image.
7. Keep the Entire Subject Visible
If the original photo already crops off part of the hair, a shoe, a hand, a product edge, or a bag strap, the AI can't reliably restore information that was never captured in the image.
Background removal can isolate visible content; it cannot recover every missing part of a cropped subject.
8. Reduce Unnecessary Overlapping Objects
A person holding multiple items, one product sitting behind another, hair overlapping patterned clothing, or a generally busy composition all force the model to work out which pixels belong to the intended subject. A simpler composition tends to help — though this doesn't mean every overlap is a dealbreaker.
9. Crop Excessive Empty Space When Useful
If the subject is tiny within a much larger image, it occupies very little of the total pixel area for the model to work with. A reasonable crop that brings the subject more into focus can give the processing workflow a clearer target.
Just be careful not to crop too tightly — leave the subject's edges fully intact in the frame.
10. Avoid Heavy JPEG Compression
Heavy compression can introduce blocking, ringing, edge artifacts, color contamination, and halos. Use the highest-quality source available.
That said, PNG doesn't automatically give better AI removal results than JPG — a high-quality JPG can work perfectly well. It's specifically heavy compression artifacts that cause problems, not the JPG format itself.
See PNG vs JPG: Which Image Format Is Better for Your Images?.
11. Pay Extra Attention to Hair and Fine Strands
Hair benefits from resolution, focus, contrast, and good lighting more than many other fine details — particularly flyaway strands, curly hair, and individual strands. Where possible, avoid photographing hair against a similarly colored, busy background.
12. Photograph Transparent Objects Carefully
Glass, bottles, sunglasses, clear plastic, and perfume bottles are inherently harder to segment, since the background is visible through the object itself.
Use a clean backdrop
Use controlled, even lighting
Make sure the outer edges are clearly visible
Capture at high resolution
Inspect the result manually afterward
These steps help, but they don't guarantee a perfect extraction on every transparent object.
13. Control Reflections on Glossy Products
Watches, jewelry, phones, cars, metal, and glossy packaging can all reflect their surroundings, and that reflected information can confuse segmentation.
Use controlled lighting
Keep the surroundings clean and simple
Avoid distracting reflections where possible
Check reflective edges carefully after processing
See How to Remove Background from Product Photos.
14. Think About Shadows Before Removing the Background
Decide ahead of time whether you want the shadow retained or removed:
Keep the shadow: Can make a product feel grounded and natural.
Remove the shadow: Useful for a fully isolated, transparent asset.
Replace or recreate it later: Useful for design workflows that need a specific look.
Keep in mind that AI may not interpret every soft or unusual shadow exactly the way you intend.
15. Inspect the Result Before Downloading or Publishing
This is a critical final step. Check:
Outer edges
Hair and fur
Hands and fingers
Thin details
Interior holes
Shadows
Transparent parts
Reflections
Remaining background patches
Accidentally removed subject areas
Don't assume that "AI processed successfully" automatically means the image is perfect.
Preview the Cutout on Both Light and Dark Backgrounds
A transparent result can look fine sitting on a checkerboard pattern in your editor and still have issues. Place it temporarily over a plain white background, and separately over a dark or strongly contrasting background. This can reveal white halos, dark halos, missing hair, leftover background residue, or rough edges that are hard to spot otherwise.
Check Interior Spaces, Not Just Outer Edges
It's easy to only check the outer outline of a cutout, but AI can leave background visible inside the subject's own geometry — for example, a mug handle's interior hole, the gaps between bicycle spokes, the spaces between chair legs, the counters inside letters like A, O, P, or R, the gap between an arm and the body, or small gaps within hair. These interior spaces deserve a dedicated check, not just a glance at the silhouette.
Choose the Right Output Format
Even a perfect cutout can be ruined by the wrong export choice. If you need transparency, use a format that supports it, such as PNG or WebP. JPG doesn't preserve transparent pixels at all.
See How to Make an Image Background Transparent and
PNG vs JPG: Which Image Format Is Better for Your Images?.
Don't Upscale a Poor Image and Expect Missing Detail to Return
It's tempting to think a small 300×300 image can be upscaled to 4K and suddenly give the AI perfect hair detail. That's not really how it works — upscaling increases pixel dimensions, but it doesn't guarantee an authentic recovery of edge detail that was never captured in the original. The best approach is to use the genuine higher-quality original when one is available.
How to Improve Background Removal for Portraits
Use a sharp photo of the face and hair
Ensure contrast between hair and background
Avoid blown-out highlights
Keep the full hair and head visible in frame
Avoid severe motion blur
Check glasses carefully in the result
Inspect flyaway hair strands
How to Improve Background Removal for Product Photos
Use a high-resolution product photo
Keep labels sharp and legible
Maintain good edge contrast
Control reflections
Keep the entire product visible in frame
Use clean, even lighting
Pay attention to thin straps or wires
Decide on shadow treatment ahead of time
Inspect any transparent parts closely
See How to Remove Background from Product Photos.
How to Improve Results for White Products
Common examples: white shoes, white clothes, a white bottle, or white packaging.
Avoid pairing a white object with an overexposed white backdrop. Instead, aim for:
Visible edge contrast
Controlled exposure
Good, even lighting
A clear subject silhouette
See How to Remove White Background from an Image.
How to Improve Results for Logos and Graphics
Logos often involve fine text, white elements, thin strokes, and anti-aliased edges, all of which benefit from a clean source.
Use the highest-quality original available
Start from a clean source file rather than a screenshot
Preserve transparency correctly on export
One useful thing to check first: if a vector or already-transparent version of the logo exists, background removal may not even be necessary.
What to Do When AI Background Removal Still Looks Bad
Tips won't fix every image. A reasonable workflow when results aren't working out:
Try a Better Original Image
↓
Check Resolution and Focus
↓
Improve Contrast if You Can Reshoot
↓
Reprocess
↓
Inspect Difficult Areas
↓
Use Manual Refinement When Necessary
See AI Background Remover vs Photoshop.
Better Input vs More Powerful Editing
A more advanced editing workflow can correct many segmentation mistakes, but starting with a clear, high-quality source usually reduces how much correction is needed in the first place.
Poor Input
↓
More Ambiguity
↓
More Correction Needed
Better Input
↓
Clearer Boundaries
↓
Potentially Cleaner Automatic Result
How ByByBG Fits Into the Workflow
Prepare the best available image. Apply the tips above where you can.
Upload to ByByBG. Choose the image you want to process.
Run background removal. Let the AI detect and remove the background.
Inspect the result. Check edges, hair, and interior spaces closely.
Download the transparent PNG. Save the result once you're satisfied with it.
For difficult images, pay particular attention to hair, reflections, transparent objects, and low-contrast edges.
Try Your Image with ByByBG →
Frequently Asked Questions
How can I improve AI background removal results?
Start with a high-resolution, sharp, well-lit source image with good contrast between subject and background, then inspect the result closely before using it.
Does image resolution affect background removal?
A higher-quality, higher-resolution source can give the model more usable detail around fine edges and hair, but resolution alone does not guarantee a better cutout. Focus, contrast, lighting, and image complexity also matter.
Does lighting affect AI background removal?
Yes. Even, balanced lighting helps preserve edge detail, while poor lighting or overexposure can hide important boundaries.
Why does AI cut off hair?
Hair has fine, complex edges that are genuinely difficult to segment precisely, especially in lower-resolution or lower-contrast images.
How do I get smoother edges after background removal?
Start with a sharp, high-resolution source image, use good contrast, and preview the result against both light and dark backgrounds to spot rough spots.
How can I avoid white edges around a cutout?
Use good contrast between subject and background, avoid heavy compression, and preview the cutout over a dark background to check for any remaining halo.
Does background color affect AI background removal?
Yes. A background color that contrasts clearly with the subject is generally easier for AI to process than one that's similar to the subject's own color.
Is PNG better than JPG for background removal?
PNG isn't inherently better for the removal process itself — a high-quality JPG can work well. PNG matters most for the export step, where transparency needs to be preserved.
Can AI remove backgrounds from low-resolution images?
It can attempt to, but results tend to be less precise, since there's less detail available for the model to work with.
How do I improve background removal for product photos?
Use a high-resolution, well-lit photo with the full product visible, good edge contrast, and controlled reflections, then inspect labels and thin edges in the result.
How do I remove a background from a white product?
Aim for some visible contrast or shadow between the white product and the background, avoid overexposure, and check the edges closely afterward.
Why do transparent objects cause problems?
Because the background is partially visible through the object, making it hard for the model to classify each pixel as purely foreground or background.
Should I crop an image before background removal?
It can help when the subject is very small within a large image, as long as you don't crop so tightly that you cut off part of the subject itself.
Does JPEG compression affect background removal?
Heavy compression can introduce artifacts around edges that make segmentation harder, though a high-quality JPG generally works fine.
What should I do if AI background removal still fails?
Try a better source image if one is available, check resolution and focus, and consider manual refinement for particularly difficult areas.
Conclusion
The quality of AI background removal depends not only on the AI model but also on the information available in the source image. A high-resolution, sharp, well-lit photo with good contrast gives the model clearer boundaries to work with, which generally leads to a cleaner result — though it doesn't guarantee a perfect one every time.
Preparing a better image, inspecting the result carefully, and exporting in the right format together make the difference between a rough cutout and one that's genuinely ready to use.
Ready to try it? Try Your Image with ByByBG →